
Introduction to Fly Tying
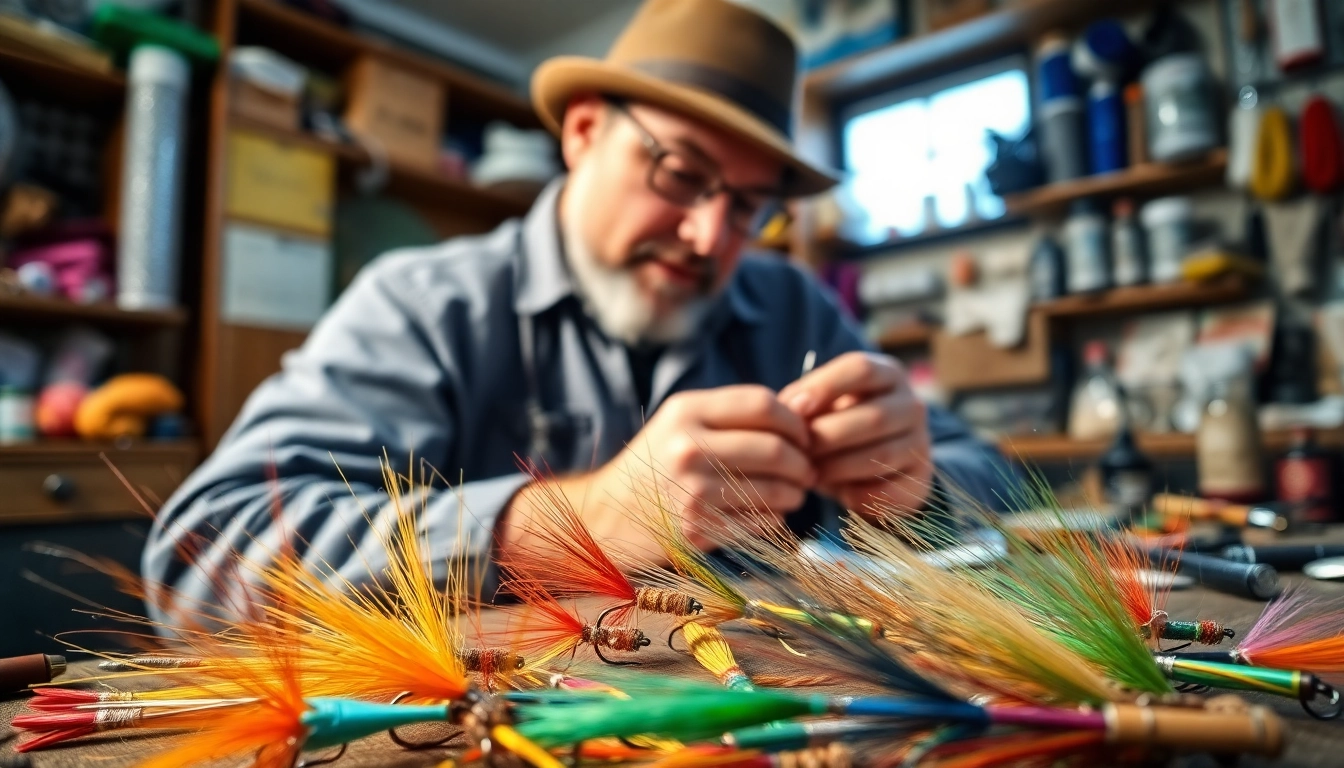
Fly tying is an art form that combines creativity, skill, and fishing knowledge. Whether you’re an experienced angler looking to fine-tune your gear or a newcomer eager to immerse yourself in the world of fishing, understanding the nuances of fly tying can elevate your fishing experience. This article covers everything from basic concepts to advanced techniques, ensuring you have the information needed to master this essential fishing skill.
What is Fly Tying?
At its core, fly tying involves crafting artificial flies that mimic aquatic insects, baitfish, or other organisms that fish feed on. These flies are attached to hooks and used as lures or baits when fishing. The method entails tying various materials—such as feathers, fur, and synthetic threads—using specific techniques to create lifelike imitations that attract fish.
The History of Fly Tying
Fly tying’s roots can be traced back hundreds of years, with evidence suggesting that anglers in ancient civilizations fashioned rudimentary flies to catch fish. The modern practice of fly tying gained momentum in the 19th century with advancements in materials and techniques. Renowned figures such as Charles F. Orvis, the father of American fly fishing, played pivotal roles in promoting fly tying as both a practical skill and a recreational art. Over time, fly tying has evolved, incorporating innovative materials and methods that continue to excite fishers worldwide.
Benefits of Fly Tying
Engaging in fly tying offers numerous benefits. Firstly, it allows anglers to create customized flies tailored to specific fishing environments and species. Secondly, it fosters a deeper connection to the craft of fishing; as you tie flies, you learn about the habits of various fish and their prey. Additionally, fly tying can be a relaxing and meditative hobby, providing an avenue for creative expression while enhancing fishing success.
Essential Tools for Fly Tying
To get started with fly tying, a selection of essential tools is necessary. Whether you’re a beginner or an experienced individual looking to expand your toolkit, understanding which tools to invest in is crucial for both efficiency and results.
Basic Fly Tying Tools
- Vise: This is the centerpiece of the fly tying process, holding the hook securely while you work. Choose a vise that allows for easy adjustments and fits various hook sizes.
- Thread: High-strength, specifically designed tying thread is used to secure materials to hooks. Common colors include black and white, but many others are available.
- Scissors: Sharp, fine-tipped scissors designed for fly tying will help you cut materials cleanly and precisely.
- Bobbin Holder: This tool holds the thread spool and ensures consistent tension while you tie, which is crucial for creating effective flies.
- Hackle Pliers: These pliers hold feather materials securely, making it easier to wrap hackles around the hook.
Advanced Tools for Precision
As you progress in fly tying, you may wish to invest in advanced tools for precision and customization. Some options include:
- Digital Scale: For ensuring the proper weight of materials, which can affect how the fly behaves in water.
- Whip Finisher: A tool that helps secure the final knot in your thread without needing fingers, creating a more polished finish.
- Dubbing Twister: This tool assists in twisting and forming dubbing materials, essential for many fly patterns.
Choosing the Right Materials
Choosing the right materials is critical to your fly tying success. Here are key categories of materials to consider:
- Hooks: Available in various shapes and sizes, the right hook depends on the specific fish species targeted.
- Fur and Feathers: Natural materials such as deer hair and hackle feathers offer excellent movement and realism in water.
- Synthetic Materials: These can include foam, mylar, and rubber, which can enhance buoyancy and durability in your flies.
Basic Techniques in Fly Tying
Now that you have your essential tools gathered, it’s time to dive into the basic techniques of fly tying. Mastering these techniques will lay the foundation for creating various fly patterns.
Understanding Different Knots
Knots play an essential role in securing materials during the tying process. Familiarize yourself with the most common knots, such as:
- Half Hitch: Often used to finish off the tying process and secure materials.
- Clinched Knot: Primarily used to attach the fly to your line, ensuring a secure connection.
- Improved Clinch Knot: A variation that provides additional security for heavier lures and flies.
Common Fly Patterns
Understanding and practicing common fly patterns is crucial. Some of the most recognized patterns include:
- Woolly Bugger: A versatile pattern that mimics both baitfish and aquatic insects.
- Parachute Adams: An excellent dry fly that imitates various mayflies.
- Elk Hair Caddis: Perfect for imitating adult caddisflies on the water surface.
First Steps in Fly Tying
Begin your fly tying journey by following these fundamental steps:
- Select a simple fly pattern that matches the tools and materials you possess.
- Secure the hook in the vise carefully.
- Start with a few basic wraps of thread to anchor your materials.
- Gradually layer materials onto the hook, securing them with additional thread wraps.
- Finish off the fly with finishing techniques to ensure durability and presentation.
Advanced Fly Tying Techniques
Once you’ve grasped the basics of fly tying, it’s time to explore advanced techniques that can enhance your skills and creativity.
Creating Custom Fly Patterns
The beauty of fly tying lies in the ability to create custom patterns specific to your fishing environment. Experiment by combining different materials, colors, and sizes to develop unique flies that better attract your target species. Keep notes of which combinations yield success and continuously refine your patterns based on your findings.
Tying Techniques for Specific Species
Different fish species have specific feeding habits and preferences. Tailoring your tying techniques accordingly can improve your catch rate. For instance:
- The trout often feed on emerging insects, so flies with soft materials that mimic hatching bugs can be effective.
- Saltwater species such as tarpon respond well to flies that mimic their local baitfish; constructing streamers with materials that flutter can entice bites.
Innovative Materials and Their Uses
Innovation in materials has revolutionized fly tying. Many fly tyers are now incorporating modern synthetic options that offer unique benefits:
- UV Resins: These allow for quick curing and provide durability, making them ideal for crafting intricate flies.
- Foams: Used extensively in surface and floating flies, they enhance buoyancy and enable striking visual designs.
FAQs About Fly Tying
How long does it take to learn fly tying?
Learning fly tying can vary; beginners often take around 5-10 hours to grasp basics, while advancing skills may take weeks or months.
What are the best materials for beginners?
Start with basic synthetic threads, feathers, and hooks. Simple kits can provide all essentials for beginners.
Can kids learn to tie flies?
Yes, kids can learn fly tying with proper supervision. Choose kits designed for younger enthusiasts for a safer experience.
What are common mistakes in fly tying?
Common mistakes include using excessive glue, overcrowding materials, or not securing knots tightly. Practice makes perfect!
How do I improve my fly tying skills?
Join local tying groups, watch tutorials, practice regularly, and seek feedback to continually enhance your fly tying skills.